|
|
|
|
|
Let's make our table really stand out. How about some borders? I don't think they're hard to make. |
|
|
|
|

|
|
Of course not. FrontPage is designed to be easy-to-use and very logical. |
|
|
To define table borders:
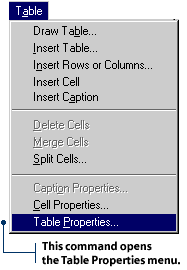
2. Click Table on the Menu bar and select Table Properties.

3. To adjust border width, adjust the spin controls on the Border Size box. The numbers you see represent "pixels" - a size measurement traditionally used by graphic designers.

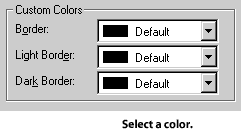
4. To adjust the color of the border and its shadows, select colors from the drop-down box under Custom Colors.

5. Click OK in the Table Properties dialog box. NOTE: If you want to use tables to lay out graphics, you can create an invisible table by choosing a zero setting in the Border Size box. FrontPage will still display the gridlines in Normal View so it will be easier for you to work with your table. However, these lines are for your reference only. They will disappear in Preview mode and your web site visitors will not see them.
|
|
|
Now it's time to add a background color to the table. It's a lot like adding a background color to a web page. |
|
|
|
|

|
|
Be careful - not all browsers will support background colors in a table |
|
|
Right, the Browser Wars of the early 21st Century. I learned all about that in Star Wars, Part 27. |
|
|
|
|
If you want to make sure that your text will be legible in all browsers, choose a text color that is in sharp contrast to your web page background. If the table's background color does not appear in your visitor's browser, people will still be able to read the text. To add a background color to a table:
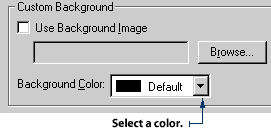
2. Click Table on the Menu bar and select Table Properties. 3. Select a color from the Background Color drop-down box.

4. Click OK in the Table Properties dialog box.

|
|
|
Uh oh. We've run out of rows and columns and we still have more teenagers to describe. We're really fizzer-razzled now! |
|
|
|
|

|
|
Chill, Pixel. We can add rows and columns to existing tables with ease. |
|
|

2. Press the TAB key on your keyboard. To add a column:
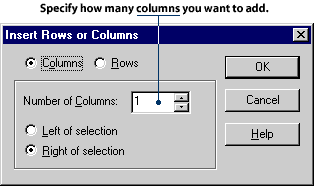
2. Click Table on the Menu bar and select Insert Rows or Columns. You will see the Insert Rows or Columns dialog box.

3. Click the Columns radio button, then adjust the spin controls on the Number of Columns box.

4. Click OK to close the dialog box.
|
|
|
|