|
When you build a spaceship, it is important to put the navigation controls in easy to reach places. The same goes for the buttons you use in Outlook Express. You will want to move buttons that you use often to accessible places and remove ones that you don't use at all.
Adding toolbar buttons
Is checking your Outbox as important as checking your Inbox? If so, you might want to add the Go to Outbox button to your toolbar. Here's how:

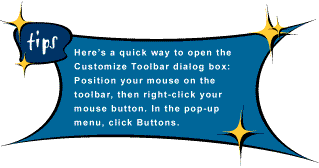
3. In the Available buttons list box, click Go to Outbox, then click the Add button. The Go to Outbox button will appear in the Toolbar buttons list box.
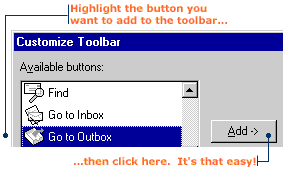
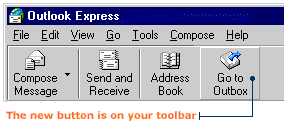
4. Click Close to return to the Window Layout Properties dialog box,
then click OK to return to the Outlook Express window. The Go to Outbox button
now appears on your toolbar.
Note: The Outlook Express window toolbar and the Inbox window toolbar are not
the same. The buttons for the bars must be customized separately.
Removing toolbar buttons
Is your toolbar getting too cluttered? Then consider cutting a button or two off. Here's how to remove the Go to Outbox button we added previously:
1. Click the View menu, then click Layout. The Window Layout Properties
dialog box will appear.
2. Click the Customize Toolbar button. The Customize Toolbar dialog box
will appear.
3. In the Toolbar buttons list box, click the Go to Outbox button, then click Remove. The Go to Outbox button now appears back in the Available
buttons list box on the left.

4. Click Close to return to the Window Layout Properties dialog box,
then click OK to return to the Outlook Express window. The Go to Outbox button
is no longer on the toolbar.
Changing the order of buttons
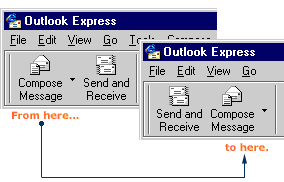
Is there a button you want in a certain place on the toolbar? Outlook Express lets you shift buttons to more convenient locations. Here, let me show you how to change the position of the Compose Message button.
1. In the Outlook Express window, click the View menu, then click Layout
to open the Window Layout Properties dialog box.
2. Click the Customize Toolbar button to open the Customize
Toolbar dialog box.
3. In the Toolbar buttons list box, click Compose Message to select it.
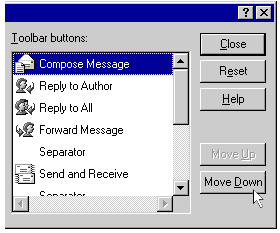
4. Click the Move Down button, until the Compose Message title is
below the Send and Receive title in the list box.
5. Click Close to return to the Window Layout Properties dialog box,
then click OK to return to the Outlook Express window.
The Compose Message button is now positioned next to the Send and Receive
button on the toolbar. Astromatix! Don't you love being in control?
|
![]()


