|
|
|
|
|
Even though this web site is a school project, it's turning out to be great fun. Maybe I'll keep adding to it from time to time. |
|
|
|
|

|
|
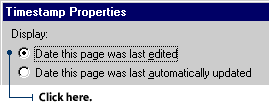
In that case, let's add a timestamp. It will automatically inform viewers when you last made changes. |
|
|
The best place for a timestamp is the opening page of your web site. This way, your visitors will see it right away. To add a timestamp:
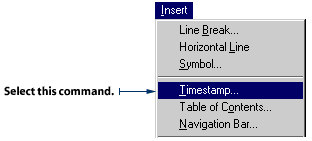
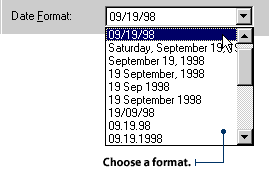
3. Choose how you want the date to be displayed by selecting a format from the Date Format drop-down box.
4. Choose how you want the time to be displayed by selecting a format from the Time Format drop-down box. If you do not want to display the update time select None.

5. Click OK on the Timestamp Properties dialog box. |
|
|
|
|
I think a lot of people are going to be hitting our web site. |
|
|
Ouch! Why do people want to hit our web site? Did it break some primitive 1990's social custom? |
|
|
|
|
No, Pixel. A "hit" is a web-term used to decribe a visit to our web page. Hits are good, so we want lots of them. If we use a "hit counter", we can keep track of how many people come to our site. |
|
|
To add a hit counter:
2. Select Active Elements and then click Hit Counter. The Hit Counter Properties dialog box will appear.
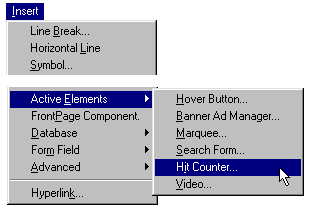

4. You can specify a start number for your counter. For example, if you want the hit counter to start from the number 10, select the Reset Counter To check box and type 10 into the box.
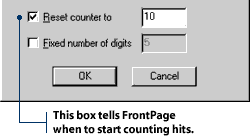
5. You can also specify how many digits you want displayed. For example, if you think only a few hundred people will hit your site, you may want to limit your counter to three digits. If so, simply select the Fixed Number of Digits check box and type 3 into the box. 6. Click OK on the Hit Counter Properties dialog box.
|
|
|
|