Clever Clips


Wow, that star is really groovy! But we need more than that. I mean, this man had his pet goldfish stolen by aliens!! How about some art?


Okay, let's bring in a little clip art. I have lots of clip art in my library. Perhaps a picture of a goldfish will do best. You know, to give the police an idea of the poor man's loss.

Now you're talkin'. I love it!
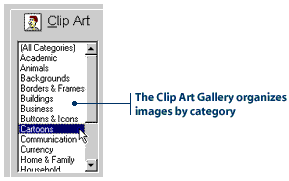
Adding clip art
You can add clip art to any slide using the Insert Clip Art button on the Standard Toolbar.

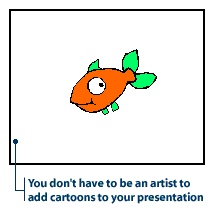
Try adding a cartoon image to your slide.

    1. On the Standard Toolbar, click the Insert Clip Art button.

Clip Art button

    2. The Microsoft Clip gallery dialog box appears.

    3. Click the Clip Art tab.

    4. In the Categories list, click Cartoons. PowerPoint displays clip art from the Cartoons category.

Clip Art Categories list

    5. Click an image to select it.

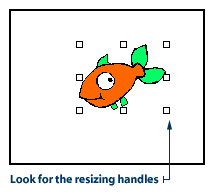
    6. Click the Insert button. The cartoon image is inserted on your slide.

Here's a artoon in your slide

Note: Some AutoLayout slides in PowerPoint already have placeholders for clip art. To insert clip art into one of these slides, simply double-click the placeholder and the clip art gallery will open.


Is there a way to resize the clip art? I think we need to make the picture of the goldfish a little bigger.


Resizing clip art
Like text boxes and shapes, it's easy to change the size of a clip art image. Here's how:

    1. Click the cartoon image to select it.

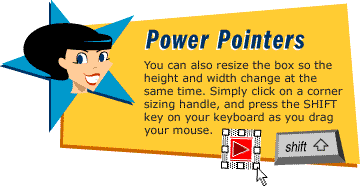
    2. Place the pointer on a resizing handle. The pointer will change into a two-headed arrow.

Adding a chart button

    3. While holding down the mouse button, drag your mouse outwards. This will enlarge the image. If you drag your mouse inwards, you will reduce the size of the image.

    4. When the image is the size you want, release the mouse button.


Resizing tip


What if we decide we just want a picture of the goldfish's face, and not his body? You know, for identification purposes. Is there a way to crop an image so that only part of it shows?


Cropping clip art
When you resize an image, you make the whole image larger or smaller. When you crop an image, you actually remove parts of the image.

The following steps will show you how to crop an image.

    1. Click the image to select it. Resizing handles will appear around the image.

Resizing Clip Art

    2. On the picture toolbar, click the Crop button.

Crop button

    3. Place the pointer in the center of a resizing handle. The pointer will change into a cropping tool.

Cursor changes to the crop tool

    4. Holding down the mouse button, drag inwards. A part of the image will disappear.

    5. When enough of the image has been cropped, release the mouse button.

    6. To turn the cropping tool off, click the crop button on the picture toolbar.

Before and After

Did you accidentally crop off too much of the image? No problem. To restore an image that has been cropped, simply click the Crop button, then click a resizing handle and drag outwards. The cropped portion of the image will reappear.


Back
Quick Quiz
Next