Pack and Print Precautions
Massive Multimedia
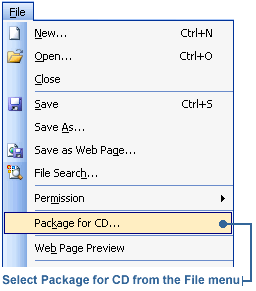
You may want to pack a presentation on disk in a number of different circumstances. Maybe
you want to let your students take a presentation home or to a special seminar at another
school. If you do plan on moving the presentation, you should avoid putting too many
multimedia elements into it.
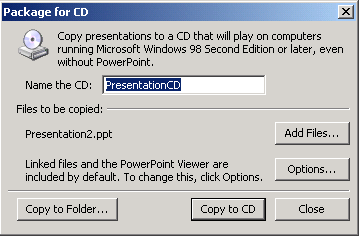
Multimedia files - like sound and video clips - are quite large, and they take up a lot
of disk space. If you want your presentation to fit on a single CD, you should keep the multimedia files to a minimum. The less disks used, the less chance
of them getting lost.
Keep It Together
Let's say you want each of your students to create a presentation that will be packed
on a disk. To help you stay organized, it's a good idea to create a separate folder for
each student - giving each folder the student's first initial and last name, for example.
When students create and save their presentations, make sure they save them to their
own individual folders. They should also transfer any multimedia files to this same
directory - the transfer should be done as soon as a new multimedia file is added to
the presentation.
Print Check
Before your students send their presentations to the printer, you should check it over
and approve it - just to make sure it's appropriate in every little way. You'll need
to make sure the printer has the capacity to print the entire presentation - that is,
the printer must have enough available memory to do the job.
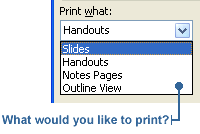
To save paper and ink:
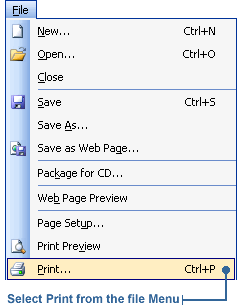
1. Click File on the menu bar and select Print.
2. Click the Properties button. A printer dialog box will appear.
3. Click the Page layout tab and select the 2-sided printing option.
4. Click OK on the printer dialog box and then click OK on the Print dialog box.